
Adding graphics to your C++ projects can significantly enhance the visual appeal and the interactivity of your applications, especially when using an Integrated Development Environment (IDE) like Dev C++. Dev C++ provides a streamlined environment where developers can write, compile, and debug their programs. However, incorporating graphical elements involves a few additional steps and specific configurations to the IDE.
As C++ does not inherently support graphics, users need to access and modify the configuration of the compiler to implement visual elements successfully. This requires the inclusion of certain header files, libraries, and linker commands. Ensuring that these components are correctly set up before programming graphics is crucial to avoid common pitfalls that can impede the development process.
Key Takeaways
- Incorporating graphics enhances the interactivity and appeal of C++ applications.
- Configuring the IDE correctly is essential for successful graphics programming.
- Understanding the basics leads to more advanced graphics implementations.
Setting Up Dev C++
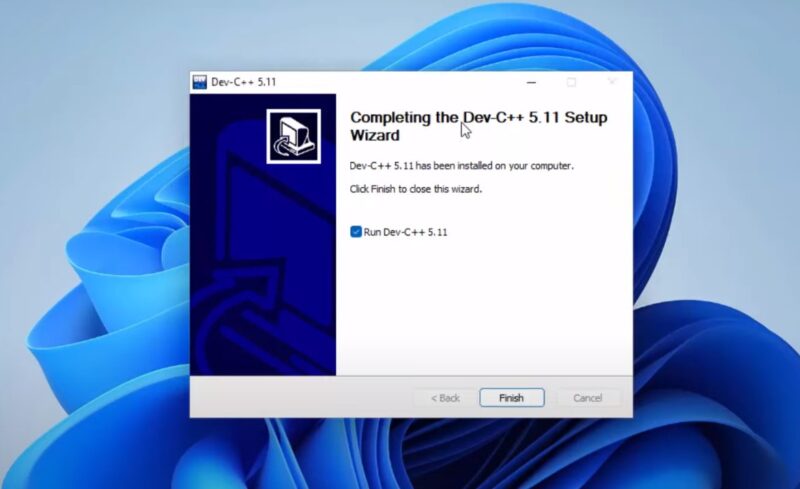
To add graphical capabilities to Dev C++, one initially needs to set up the environment correctly. This involves downloading the latest version and executing a proper installation process.
Downloading Dev C++
Dev C++ is an Integrated Development Environment (IDE) for C and C++ programming languages. It is essential to download the latest version of Dev C++ to ensure compatibility with graphics programming. Users can typically find the download link on the official Bloodshed Dev C++ website or other trusted sources. For graphics, a version that integrates easily with graphic libraries is preferred.
Installation Process
Once the executable file is downloaded, the user may begin the installation process. This process includes the following steps:
- Run the installer program.
- Accept the license agreement.
- Choose the installation directory. It is advisable to install it in a directory without any spaces in its path, such as C:\Dev-Cpp.
- Select the components to install, which should include the compiler and the IDE.
- Complete the installation by following the on-screen prompts.
After completing these steps, the user will have Dev C++ set up on their system, ready for further configuration such as adding libraries for graphics functions.
Working with Graphics in Dev C++
Integrating graphical content into applications can significantly enhance the user experience. Dev C++ facilitates this through the inclusion of graphics libraries and the configuration of compiler options.
Including Graphics Libraries
To incorporate graphics in Dev C++, one begins by including the graphics library in their project. This involves:
- Downloading the necessary files such as
graphics.hand any additional source files related to it. - Placement of these files into the correct directories within the Dev C++ environment. Header files usually go into the
includesubdirectory.
The libraries serve as a bridge between the code and the graphical interface, enabling the programmer to implement visual elements.
Setting Up Compiler Options
After including the appropriate graphics libraries, the next step is to set up the compiler to recognize and link these libraries during the build process:
- Compiler Suite Modification: Change the compiler suite to the version that supports graphics in Dev C++.
- Linker Configuration: Add the necessary linker commands to the project options. Typical linkers for graphics in Dev C++ include
-lbgi,-lgdi32, and-lcomdlg32.
By carefully adjusting the compiler settings, developers can ensure that their graphics are correctly rendered when their application is executed.
Creating a Graphics Project

To integrate graphics into a Dev C++ project, one must initiate a new project and adjust the project settings appropriately to handle graphical operations.
Starting a New Project
To begin, one opens Dev C++ and selects File -> New -> Project. In this interface, ensure the project type is set to, allowing for graphics library inclusion. If Console Graphics is not available, choose the Empty Project and set the intended language to C++. This step is crucial as it lays the foundation for adding graphical elements to the project.
Configuring Project Settings
Once the project has been created, the next phase involves configuring the project settings to incorporate graphics libraries such as OpenGL, DirectX, SDL, SFML, or Allegro. This configuration is accessed via Project -> Project Options -> Parameters. In the linker section, the necessary libraries for graphics such as -lbgi, -lgdi32, -lcomdlg32, -luuid, -loleaut32, and -lole32 are included. Additionally, the directory paths to the header files and source files for the graphics must be included in the project settings by accessing Tools -> Compiler Options. It is through these settings that the graphics components can effectively be compiled and linked to the C++ project.
Developing Graphics Code

Incorporating graphics in Dev C++ involves writing specific functions and ensuring proper compiling and linking for successful execution.
Writing Graphics Functions
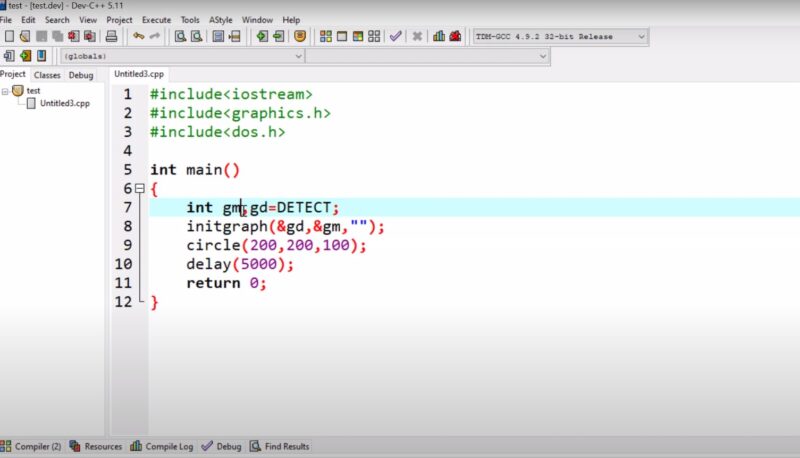
Graphics programming in Dev C++ requires the inclusion of graphics.h. Programmers typically start by setting up their graphical environment using the initgraph function. This initializes the graphics system by loading a graphics driver from disk (if not loaded yet) and putting the system into graphics mode. Then, one can make use of various drawing functions like line(), circle(), and rectangle() to create graphical content. For example, to draw a line, the function line(x1, y1, x2, y2); is used, where (x1, y1) and (x2, y2) are the coordinates of the line’s starting and ending points.
Compiling and Running Your Code
After writing the graphics code, the next step is compiling and running the program. To do this in Dev C++, changes in the compiler settings are necessary to include the graphics library. The user must link against the libbgi.a library to make use of BGI graphics. The following flags need to be added in the linking options:
-lbgi-lgdi32-lcomdlg32-luuid-loleaut32-lole32
These instructions inform the compiler about the additional libraries that are required for graphics functionalities. After configurations are complete and the code is ready, compiling and running can be done straight from the IDE, and if everything is correctly set up, a graphical window displaying the intended graphical elements should appear.
Advanced Graphics Programming

In the realm of Dev C++, advanced graphics programming extends beyond basic rendering to include complex functionalities and performance tuning. It demands a deeper understanding of graphics libraries and efficient coding practices.
Utilizing Advanced Graphics Functions
For developers striving to leverage more sophisticated graphics capabilities in Dev C++, it is essential to be proficient with various libraries that enable advanced graphics. Libraries such as OpenGL, DirectX, SDL, SFML, and Allegro offer a wide range of functions for creating intricate visual effects and simulations. Integration of these libraries often begins by including the respective header files and linking against their binaries.
- OpenGL: Used for cross-platform graphics, includes features for detailed image rendering and geometric transformation.
- DirectX: Provides tools for high-speed, high-fidelity gaming graphics on Windows platforms.
- SDL: Simplifies access to audio, keyboard, mouse, and graphics hardware via OpenGL or Direct3D.
- SFML: Stands out for its simplicity for 2D game development, providing a suite of modular tools for audio and network too.
- Allegro: Offers extensive facilities for 2D games and multimedia programming with a focus on simplicity and ease of use.
Optimizing Graphics Performance
Performance optimization is paramount in graphics programming, and several strategies can be employed to enhance efficiency in Dev C++:
- Minimize state changes: Reducing the number of state changes, such as texture bindings or shader switches, can help in preventing bottlenecks.
- Use appropriate data structures: Employing optimal data structures, like spatial partitioning trees or scene graphs, ensures that only visible objects are processed and rendered.
- Efficient memory management: Utilizing memory pools for dynamic objects can reduce the overhead caused by frequent allocations and deallocations.
- Optimize asset sizes: Using compressed textures and lower polygon count models where possible can alleviate memory bandwidth and improve rendering speed.
Cognizance of these techniques is crucial for developers as they create applications with demanding graphics requirements within the Dev C++ environment. By applying these advanced methods, one effectively enhances the visual fidelity and performance of graphics in their applications.
Frequently Asked Questions
What steps are needed to incorporate graphics.h in C++ using Dev C++ IDE?
To incorporate graphics.h in C++ using the Dev C++ IDE, one must start by downloading and updating to the latest version of Dev C++. Then, header source files and library files related to graphics must be added into the respective Dev C++ directories.
Which graphics library is recommended for usage with C++ and how can it be added?
The graphics library commonly recommended for usage with C++ is the WinBGIm library, an extension of the graphics.h library. This can be added to Dev C++ by downloading the Graphics.h and winbgim header files, as well as the libbgi library, and placing them into the include and lib directories of Dev C++. Configuration of the library files within the compiler settings is also necessary. .
How can Initgraph be utilized within the Dev C++ environment for graphics implementation?
Initgraph is utilized within the Dev C++ environment to initialize the graphics system by loading a graphics driver from disk, and setting the initial graphics mode. It requires specifying the graphics driver and mode, which can be guided by the graphics library documentation. Ensure that the library paths are correctly configured in the Dev C++ to avoid issues.
What are the instructions for downloading and adding graphics.h in a project compiled with MinGW using Dev C++?
For projects compiled with MinGW using Dev C++, the graphics.h header file should be downloaded separately and added to the include directory of MinGW. This is followed by linking against the corresponding graphics library, ensuring the compiler is set to MinGW within Dev C++. The required linkers should then be appropriately configured within the project settings of the Dev C++.
How can you integrate graphics when working with Visual Studio Code?
While not specific to Dev C++, integrating graphics.h when working with Visual Studio Code involves a similar process of including the header file and linking to the relevant graphics library.
One must ensure that the Visual Studio Code environment is correctly setup with the necessary C++ compiler that supports graphics, and then configure the project settings to recognize and include the graphics library. It’s essential to refer to Visual Studio Code’s documentation for the specifics applicable to that IDE.