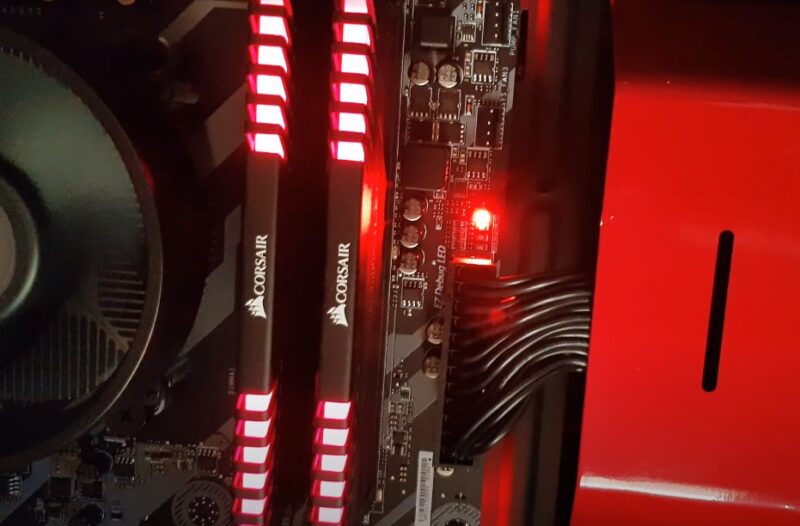
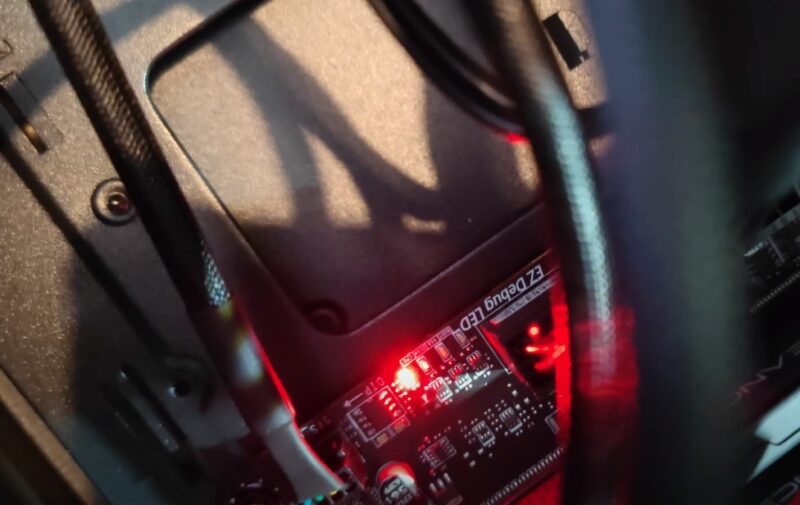
A red CPU light on a motherboard signals CPU-related issues, leading to booting difficulties or instability. Frequent culprits include malfunctioning CPU cooling fans, damaged CPUs, inadequate power supplies, RAM/GPU not seated correctly, misconnected storage drives, and incorrect BIOS settings.
To address these problems, the article provides specific solutions and preventative advice to resolve the red CPU light issue and ensure system stability.
Central Processing Unit Fan and Connection
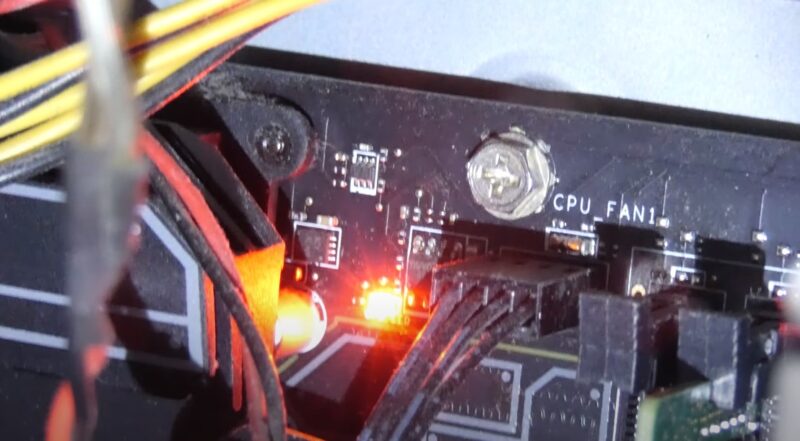
The red central processing unit light often points to a CPU or its cooling system malfunction. A common issue is a faulty or poorly connected CPU fan.
This can hinder the fan’s ability to adequately cool the CPU. Overheating CPUs can harm the motherboard and other components, or trigger unexpected computer shutdowns.
It’s crucial to check the fan’s functionality and its connection to the motherboard.
Troubleshooting
-
Power Off and Disconnect: Turn off the computer and unplug the power cord from the wall outlet.
-
Locate the Fan: Open the computer case and locate the CPU fan on the motherboard. It typically resembles a large metal heatsink with an attached fan.
-
Inspect the Fan: Check for damage, dust, or dirt. Clean the fan gently with a soft brush or compressed air.
-
Check the Fan Connector: Verify the connector’s firm attachment to the motherboard’s fan header. Try wiggling it to check for looseness or bad contact.
-
Reseat or Replace the Connector: If the connector is loose or damaged, try reseating it or replacing it with a new one.
-
Test Fan Voltage: Use a multimeter to test the fan connector’s voltage and ensure it receives adequate power from the motherboard.
-
Replace a Damaged or Incompatible Fan: If the fan is damaged or incompatible, replace it with a new one matching the CPU specifications and motherboard socket. Consult the manufacturer’s website or user manual.
Verifying Resolution
-
Close the Computer Case and Reconnect Power: Close the computer case and plug the power cord back into the wall outlet.
-
Monitor CPU Temperature and Fan Speed: Use a software tool or BIOS settings to monitor CPU temperature and fan speed.
-
Address Persistent Red Light: If the red light persists, consider troubleshooting other potential causes, such as a faulty CPU, improper thermal paste application, or a defective motherboard.
Installation and Motherboard Connectivity
Improper CPU installation or damaged processor pins might be another reason, disrupting the CPU’s interaction with other components. If the CPU isn’t properly positioned, it can lead to excessive heat, which may damage the motherboard or cause the computer to unexpectedly shut down.
Inspecting and Reinstalling the CPU
-
Power Off and Disconnect: Ensure the computer is off and unplugged from the power outlet.
-
Locate the CPU: Open the computer case and identify the CPU, typically a square metal chip with an attached fan.
-
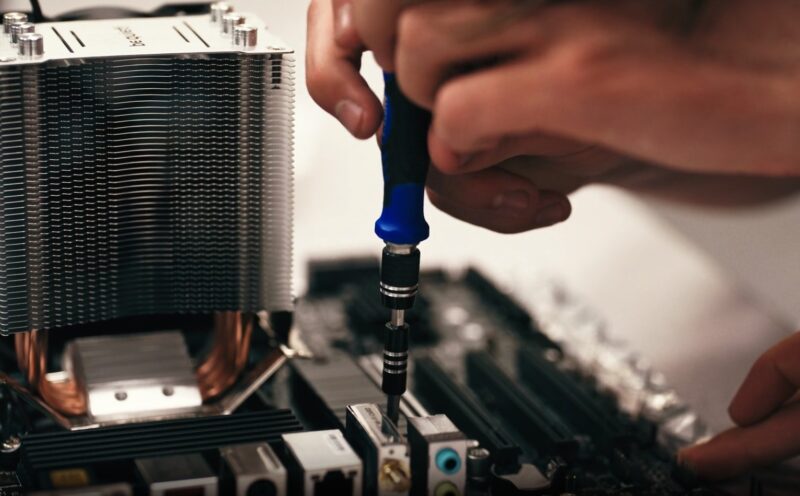
Remove Fan and Heatsink: Carefully detach the fan and heatsink from the CPU. This may involve unscrewing or unclipping them from the motherboard. Gently twist to break the thermal paste seal.
-
Extract the CPU: Lift the CPU locking lever and gently pull out the CPU from the socket. Avoid touching the CPU pins or socket contacts.
-
Inspect for Damage: Examine the CPU and socket for damage, including bent or broken pins, dust, or debris. Use a magnifying glass or flashlight for better visibility. Clean the CPU and socket with a soft brush or compressed air.
-
Repair Bent Pins (Risky Procedure): If pins are bent or broken, attempt to straighten them with a needle or tweezer. This is a delicate process and may cause further damage.
-
Replace Damaged CPU or Socket: If damage is irreparable, replace the CPU or socket with new ones matching the motherboard specifications and CPU socket type. Check manufacturer websites or user manuals for compatibility.
-
Reinstall the CPU: Align the CPU with the socket and ensure the notches match. Gently lower the CPU into the socket and lock it with the lever. Avoid forcing or wiggling the CPU.
-
Apply Thermal Paste: Apply a thin layer of thermal paste to the CPU’s top. This facilitates heat transfer from the CPU to the heatsink and fan. Use an appropriate amount to avoid cooling performance issues or overheating.
-
Reattach Heatsink and Fan: Securely reattach the heatsink and fan to the CPU and the motherboard, ensuring proper connection to the power supply.
Power Supply Unit and Its Connection
Another cause might be an insufficient or defective power supply, which impairs the CPU’s capability to get enough power to function properly. An inadequate or malfunctioning power supply can also impact the stability and performance of the motherboard and other components and may lead to unexpected shutdowns.
Inspecting and Testing the Power Supply Unit
-
Power Off and Disconnect: Ensure the computer is turned off and unplugged from the power outlet.
-
Locate the Power Supply Unit (PSU): Open the computer case and identify the PSU, typically a large metal box with a fan and various cables attached.
-
Disconnect Power Cables: Carefully detach the PSU cables from the motherboard and other components, such as the hard drive, optical drive, and graphics card. Press latches or clips to release the cables from the connectors. Note their location and orientation for reconnection.
-
Testing Methods:
a. Multimeter: Use a multimeter set to measure DC voltage. Connect the probes to the PSU cables. Identify cable voltages using the color code:
• Yellow: +12V • Red: +5V • Orange: +3.3V • Black: Ground • Green: Power On • Gray: Power Good
b. Paperclip Method: Bend a paperclip into a U shape. Insert one end into the green wire connector and the other into any black wire connector on the 24-pin main power connector. This creates a short circuit, activating the PSU.
-
Power On and Voltage Check:
a. Multimeter: Connect the power cord and turn on the PSU using the switch on the case. If functional, the fan should spin, and the multimeter should display the correct voltage for each cable:
• Yellow: 11.4V to 12.6V • Red: 4.75V to 5.25V • Orange: 3.135V to 3.465V • Gray: 2.4V to 6.0V
b. Paperclip Method: Connect the power cord and turn on the PSU. If functional, the fan should spin.
-
PSU Replacement: If the PSU fails these tests, it’s likely damaged or faulty and requires replacement. Choose one compatible with the system requirements and power connector type. Refer to the manufacturer’s website or user manual for compatibility information.
Reconnecting and Verifying System Status
-
Reconnect Power Cables: Reconnect the PSU cables to the motherboard and other components firmly and aligned with the connectors. Use cable ties or clips to organize and prevent airflow obstruction.
-
Close Case and Reconnect Power: Close the computer case and reconnect the power cord.
-
Start the Computer: Turn on the computer and monitor CPU temperature and fan speed using a software tool or BIOS settings.
-
Persistent Red Light: If the red light remains illuminated, consider troubleshooting other potential causes, such as a faulty CPU, a malfunctioning fan, improper thermal paste application, or a defective motherboard.
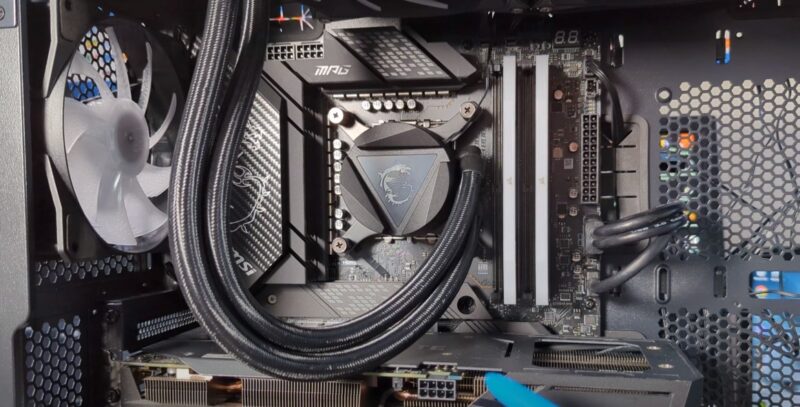
Reseat the RAM and the GPU
The red CPU light may turn on due to improper RAM installation or damaged RAM. RAM, short for random access memory, is vital for storing temporary data for CPU processing.
Incorrectly placed RAM in the motherboard slots or faulty or incompatible RAM modules can disrupt communication between the CPU and RAM, triggering the red light to signal an error.
Reseating RAM and GPU
-
Power Down and Disconnect: Turn off the computer and unplug it from the power source.
-
Locate RAM and GPU Slots: Open the computer case and identify the RAM and GPU slots on the motherboard.
-
Remove and Inspect RAM Modules: Carefully remove the RAM modules by pushing down the tabs and pulling them out. Inspect for damage or incompatibility.
-
Reinstall RAM Modules: Align the notch on the module with the slot and gently push until it clicks in. Repeat for all modules.
-
Remove and Inspect GPU: Unscrew the bracket and gently pull out the GPU. Inspect for damage or incompatibility.
-
Reinstall GPU: Align the notch on the GPU with the slot and gently push until it clicks in. Securely screw the bracket.
-
Reconnect Power Cables: Ensure the GPU is properly connected to the power supply with the appropriate cables.
Verify and Further Troubleshoot
-
Power On and Check Light: Close the case, plug in the power cord, and turn on the computer. Check if the red light is still on.
-
Persisting Red Light: If the light persists, consider further troubleshooting or seek professional assistance.
Reconnect the Storage Drives
The red light might also indicate issues with accessing data and programs stored on hard drives or SSDs. If these storage devices, connected to the motherboard by cables, have loose or damaged cables, or if the drives are faulty or incompatible, the CPU may be unable to access necessary data, causing the red light to signal an error.
Re-establishing the Connection Between Storage Drives
-
Power Down and Disconnect: Turn off the computer and unplug it from the power source.
-
Locate Storage Drives and Cables: Open the computer case and find the storage drives and their corresponding cables.
-
Disconnect Cables: Carefully detach the cables from the storage drives and the motherboard. Avoid touching the metal contacts.
-
Inspect Cables and Drives: Check for damage, such as cracks, burns, or bent pins. Verify compatibility with the motherboard’s specifications.
-
Reconnect Cables and Drives: Align the metal contacts and gently push the cables into the slots until they click. Secure the connections.
BIOS Settings and Further Troubleshooting
-
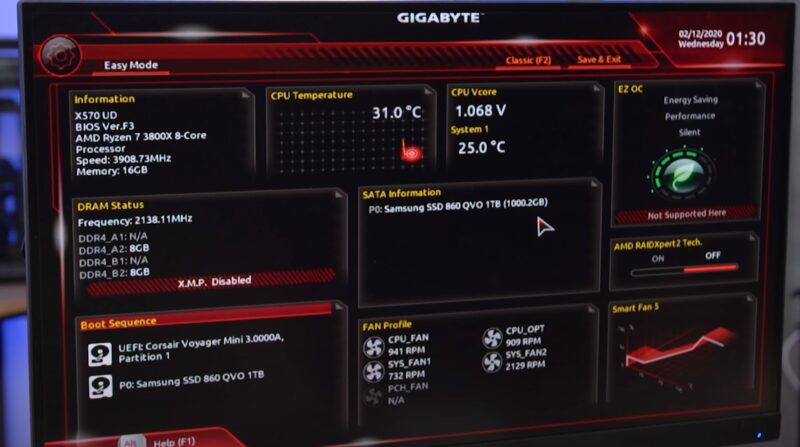
Power On and Enter BIOS: Close the case, reconnect the power cord, and turn on the computer. Enter BIOS settings using the appropriate key (F2, F10, F12, or Esc).
-
Verify Storage Drive Detection: Locate the storage settings menu (Boot, Storage, or Advanced). Ensure all connected drives are listed.
-
Configure Boot Order and Boot Mode: Set the boot order and boot mode according to your drive and operating system. Consult online resources or contact a professional if unsure.
-
Save BIOS Settings and Restart: Save the BIOS changes and exit using the appropriate key. Restart the computer.
-
Check Red Light: If the light persists, further troubleshooting or professional assistance may be required.
-
Address Operating System Issues: If the light is off but the computer doesn’t boot, the operating system may be corrupted or missing. Repair or reinstall the operating system using a recovery disk or bootable USB drive. Seek help if needed.
Reset or Update the BIOS
The red light may also be triggered by incorrect or outdated BIOS settings. BIOS, the basic input/output system, is firmware managing communication between the CPU and other computer hardware. If these settings are not correctly configured or are outdated, the CPU might fail to recognize or interact properly with the hardware, leading to the red light signaling an error.
Resetting or Updating the BIOS
-
Power Down and Disconnect: Ensure the computer is off and unplugged from the power source.
-
Locate Jumper or CMOS Battery: Open the computer case and identify the jumper or CMOS battery on the motherboard, typically near the BIOS chip or RAM slots.
-
Reset BIOS Using Jumper: If using a jumper, carefully move it from its original position to the reset position, as indicated in the manual or online. Wait a few seconds and move it back.
-
Reset BIOS Using CMOS Battery: If using a CMOS battery, remove it from its slot, wait a few minutes, and reinsert it firmly.
-
Update BIOS Using USB or Internet: Insert the USB flash drive with the latest BIOS update or connect to the Internet.
-
Enter BIOS Settings: Turn on the computer and enter the BIOS by pressing the appropriate key (F2, F10, F12, or Esc) during startup.
-
Locate BIOS Update Option: In the BIOS settings, find the option to update the BIOS, usually under a menu called Update, Flash, or Advanced.
-
Select Update Source: Follow the on-screen instructions to select the USB flash drive or internet connection as the update source.
-
Initiate and Complete Update: Confirm the update and wait for it to complete. Avoid interrupting the process, as this could damage the system.
-
Save BIOS Settings and Exit: Save the BIOS changes and exit by pressing the appropriate key (F10 or Esc).
Verifying Resolution
-
Restart and Check Light: Restart the computer and observe if the red light remains illuminated.
-
Persisting Red Light: If the light persists, consider further troubleshooting or seek professional assistance.
-
Address Operating System Issues: If the light is off but the computer doesn’t boot, the operating system may be corrupted or missing. Repair or reinstall the operating system using a recovery disk or bootable USB drive. Seek help if needed.
FAQ
Can a dirty or dusty environment cause the red light to turn on?
Yes, dust accumulation can obstruct airflow and cooling, leading to overheating and triggering the red CPU light. Regular cleaning of the computer’s interior can help prevent this.
Does the red light always indicate a serious problem?
Not necessarily. Sometimes it can be a minor issue like a loose cable or incorrect BIOS setting. However, it’s important to investigate as it could indicate a more serious problem.
Can outdated BIOS cause the red light to appear?
Yes, outdated BIOS can lead to compatibility issues with hardware, causing the red CPU light. Updating the BIOS can resolve such issues.
Is it safe to straighten bent CPU pins myself?
Straightening bent CPU pins is risky and can cause further damage. It’s often safer to seek professional help unless you have experience and the right tools.
Can the red light be a sign of power supply issues?
Yes, an inadequate or failing power supply can fail to provide sufficient power to the CPU, triggering the red light.
If the red light persists after troubleshooting, what should I do?
If the light remains after basic troubleshooting, it’s advisable to consult a professional technician, as the issue might be complex or involve delicate components like the motherboard or CPU.
Bottom Line
This article covers possible causes and solutions for the red CPU light issue in computers. The red light signals issues in CPU communication with hardware like RAM, GPU, or storage drives.
Causes include incorrect or outdated BIOS settings, loose or damaged cables or drives, or incompatible hardware. Solutions involve resetting or updating the BIOS, reseating RAM and GPU, reconnecting storage drives, or replacing incompatible hardware.
Additionally, repairing or reinstalling the operating system might be necessary if it’s corrupted or missing. Fixing this issue is crucial to prevent system damage and enhance performance and stability.
To avoid future problems, maintain a cool, clean, and stable system, avoid overclocking, update BIOS and drivers regularly, and perform routine data scans and backups.